PRESENT Tutorial - Present.do (En)
/
π User Manual
Share
User Manual
κ°€λ¬λ¦¬ 보기
Table
Search
1. Click the sign up button
β’
Click
[Sign up]
in the top right corner.
2. Choose how to sign up
β’
Sign up with
Google, Facebook, Apple, Linkedin
or
email
.
Sign up
Beginner
PDF files can be uploaded from
Production > Files
or
Files in Studio.
1. Go to the studio
β’
After logging in, click
[Create]
at the top right to go to the studio.
β’
Or go to the studio by clicking
Production > Documents > [Create a new document]
.
2. Upload PDF to File
β’
When you enter the studio, the
Files
tab is open. In this case, click
[Upload a pdf file]
at the top to upload the desired pdf file.
β’
If you have a previously uploaded pdf file, you can select and use it.
Upload file
Beginner
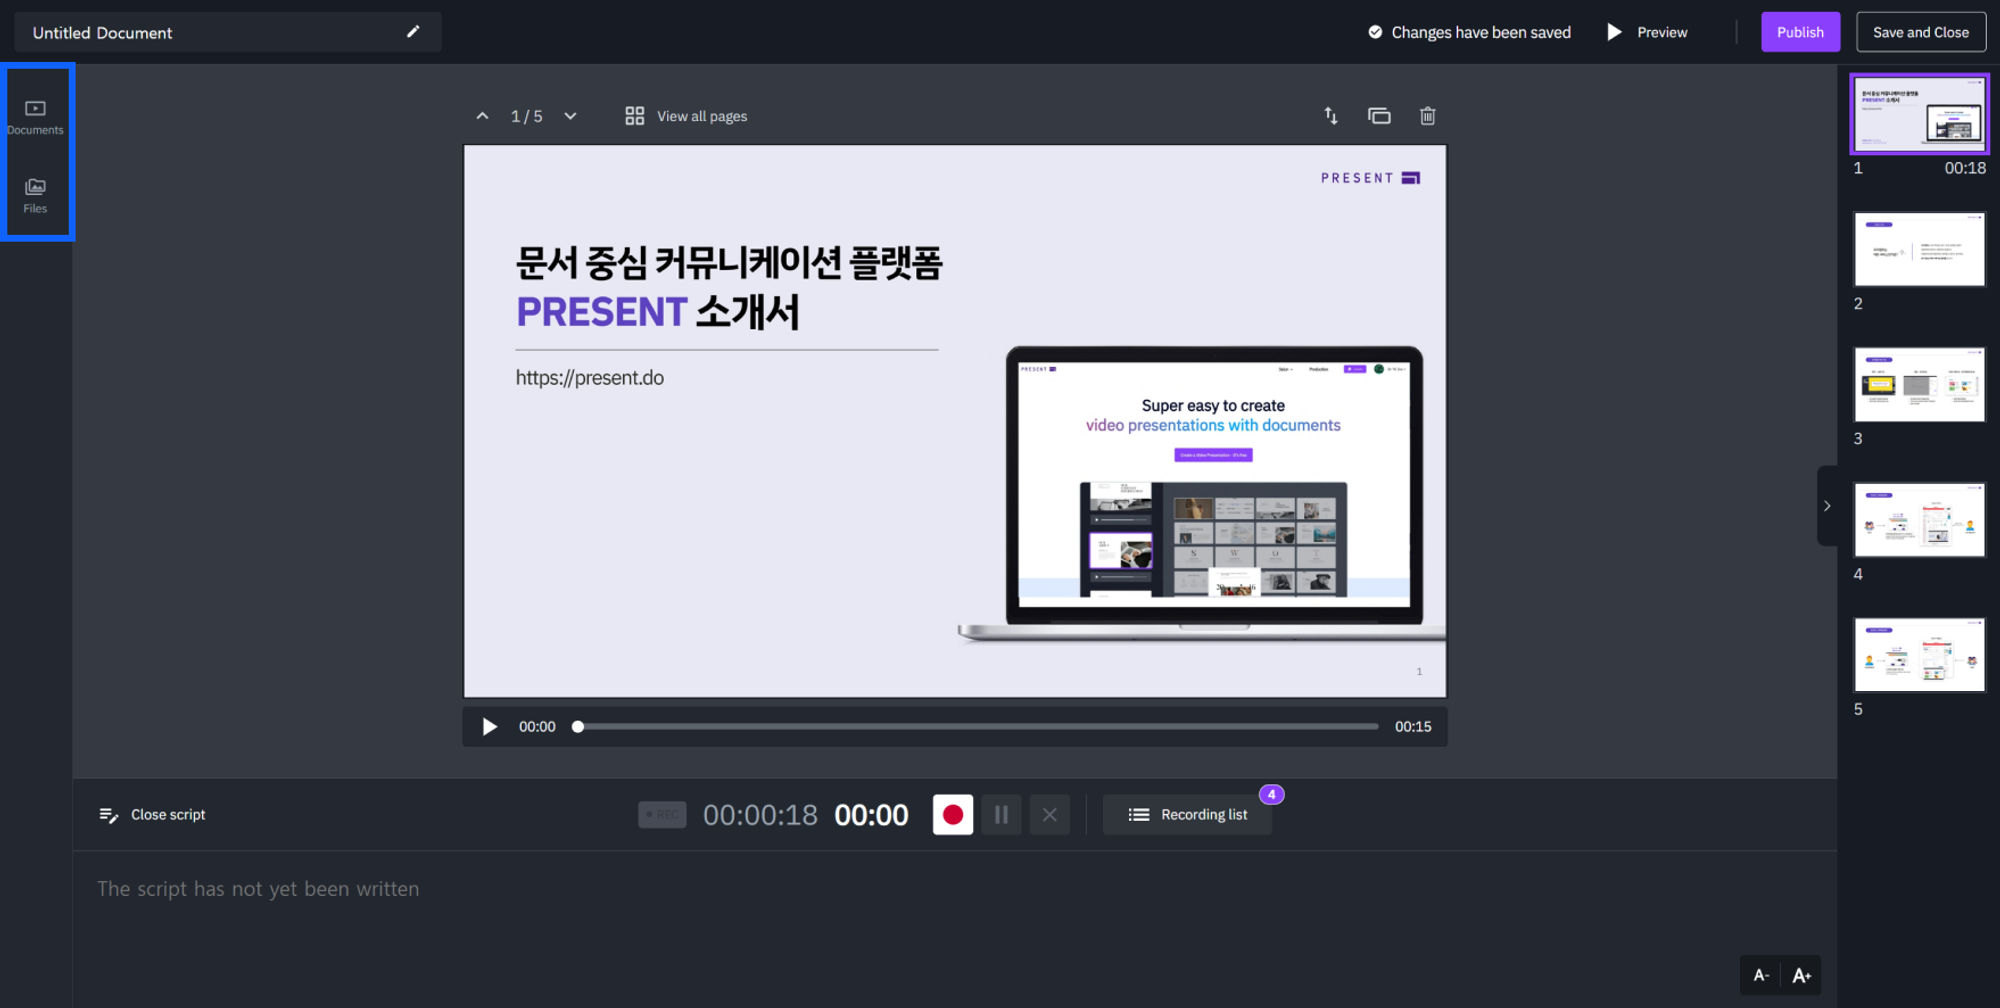
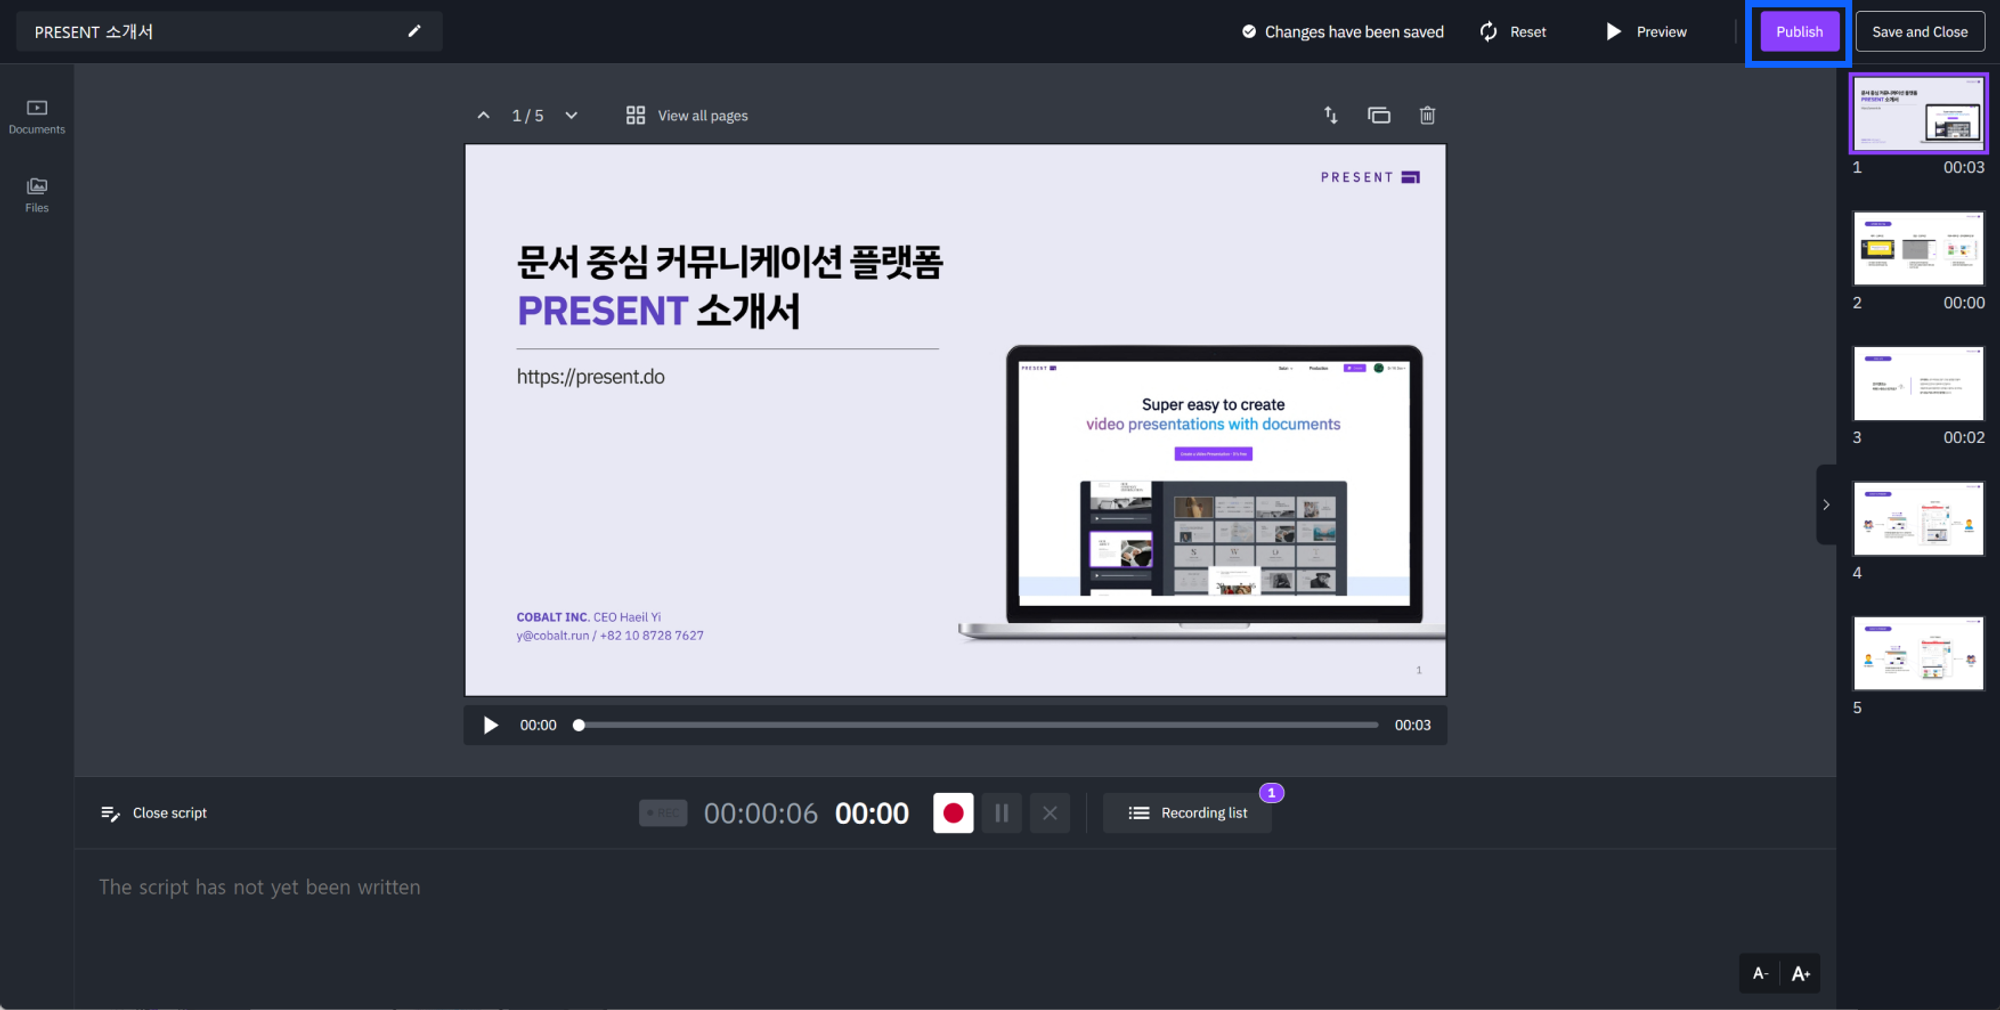
1. Click the Start recording button
β’
Select the page you want to record in the
studio
and click
[Start recording]
at the bottom to start recording.
If it is hard to voice record right away, try writing the
script
below!
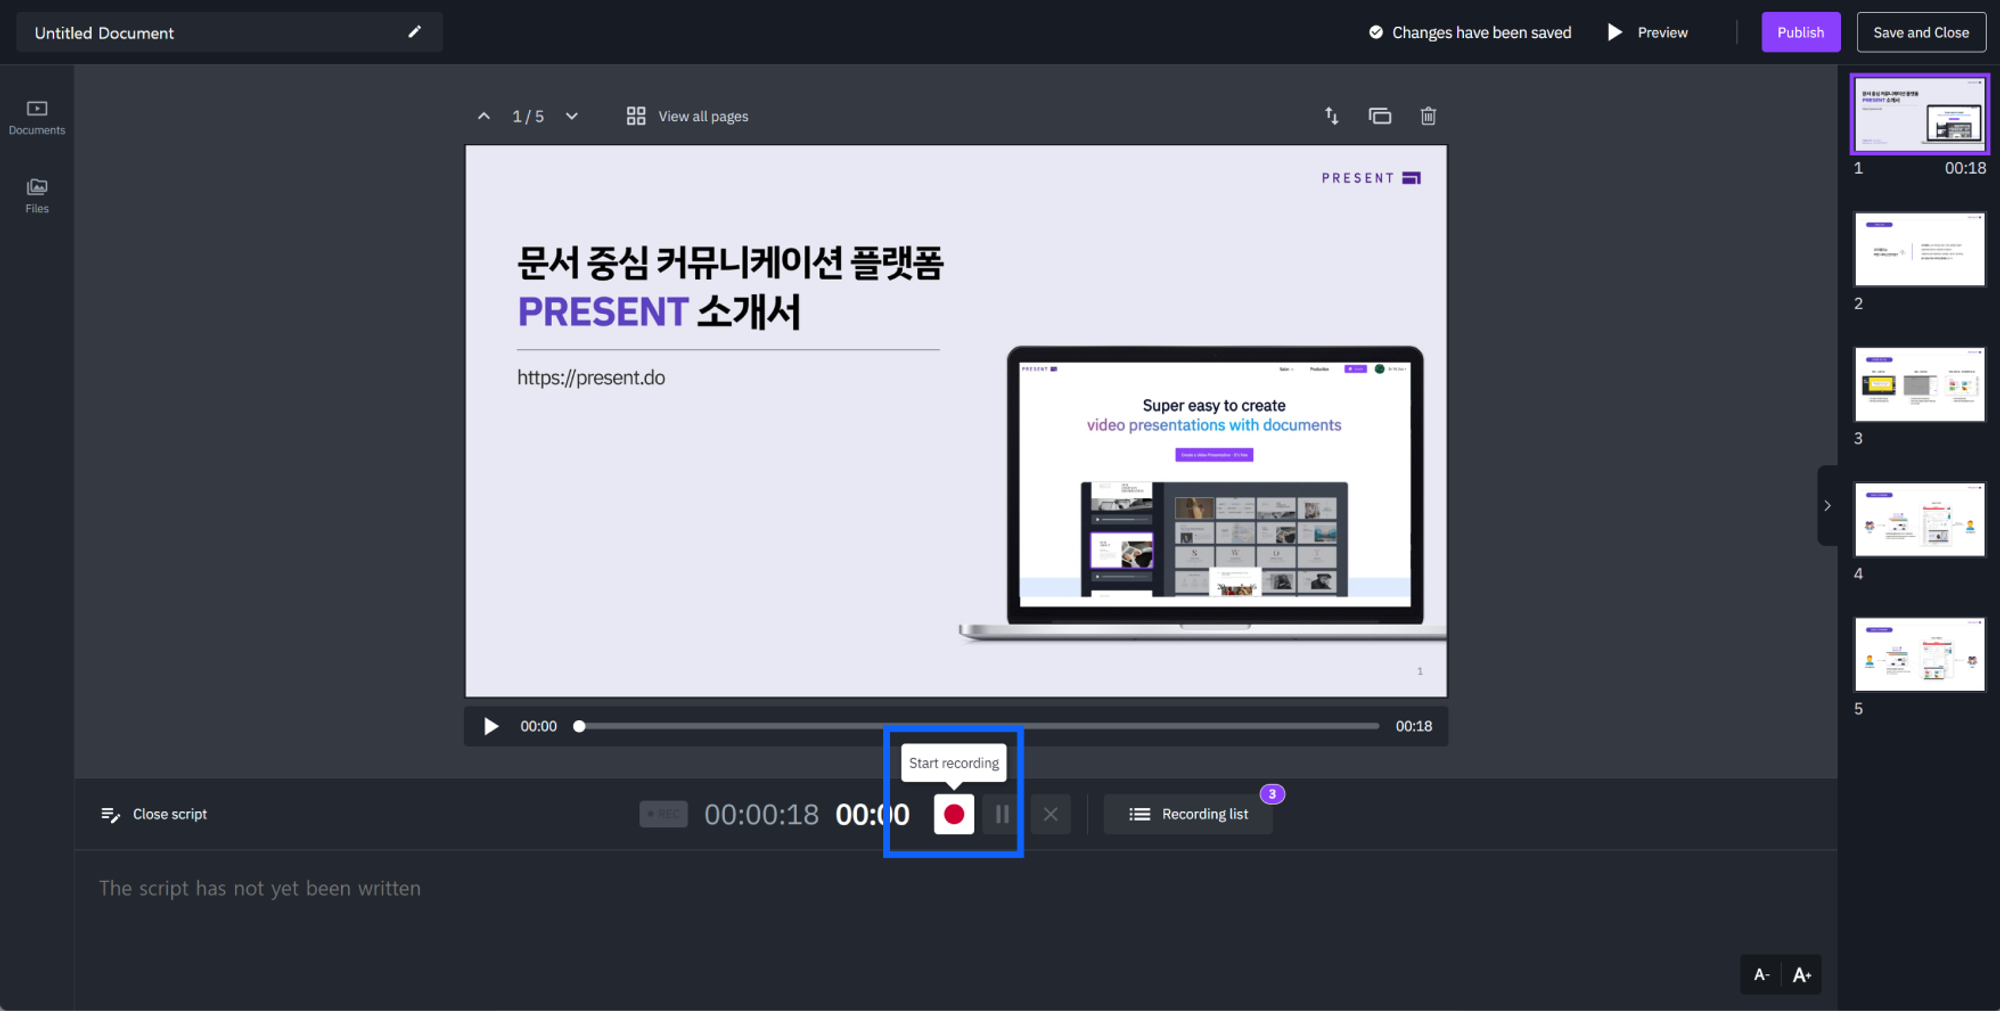
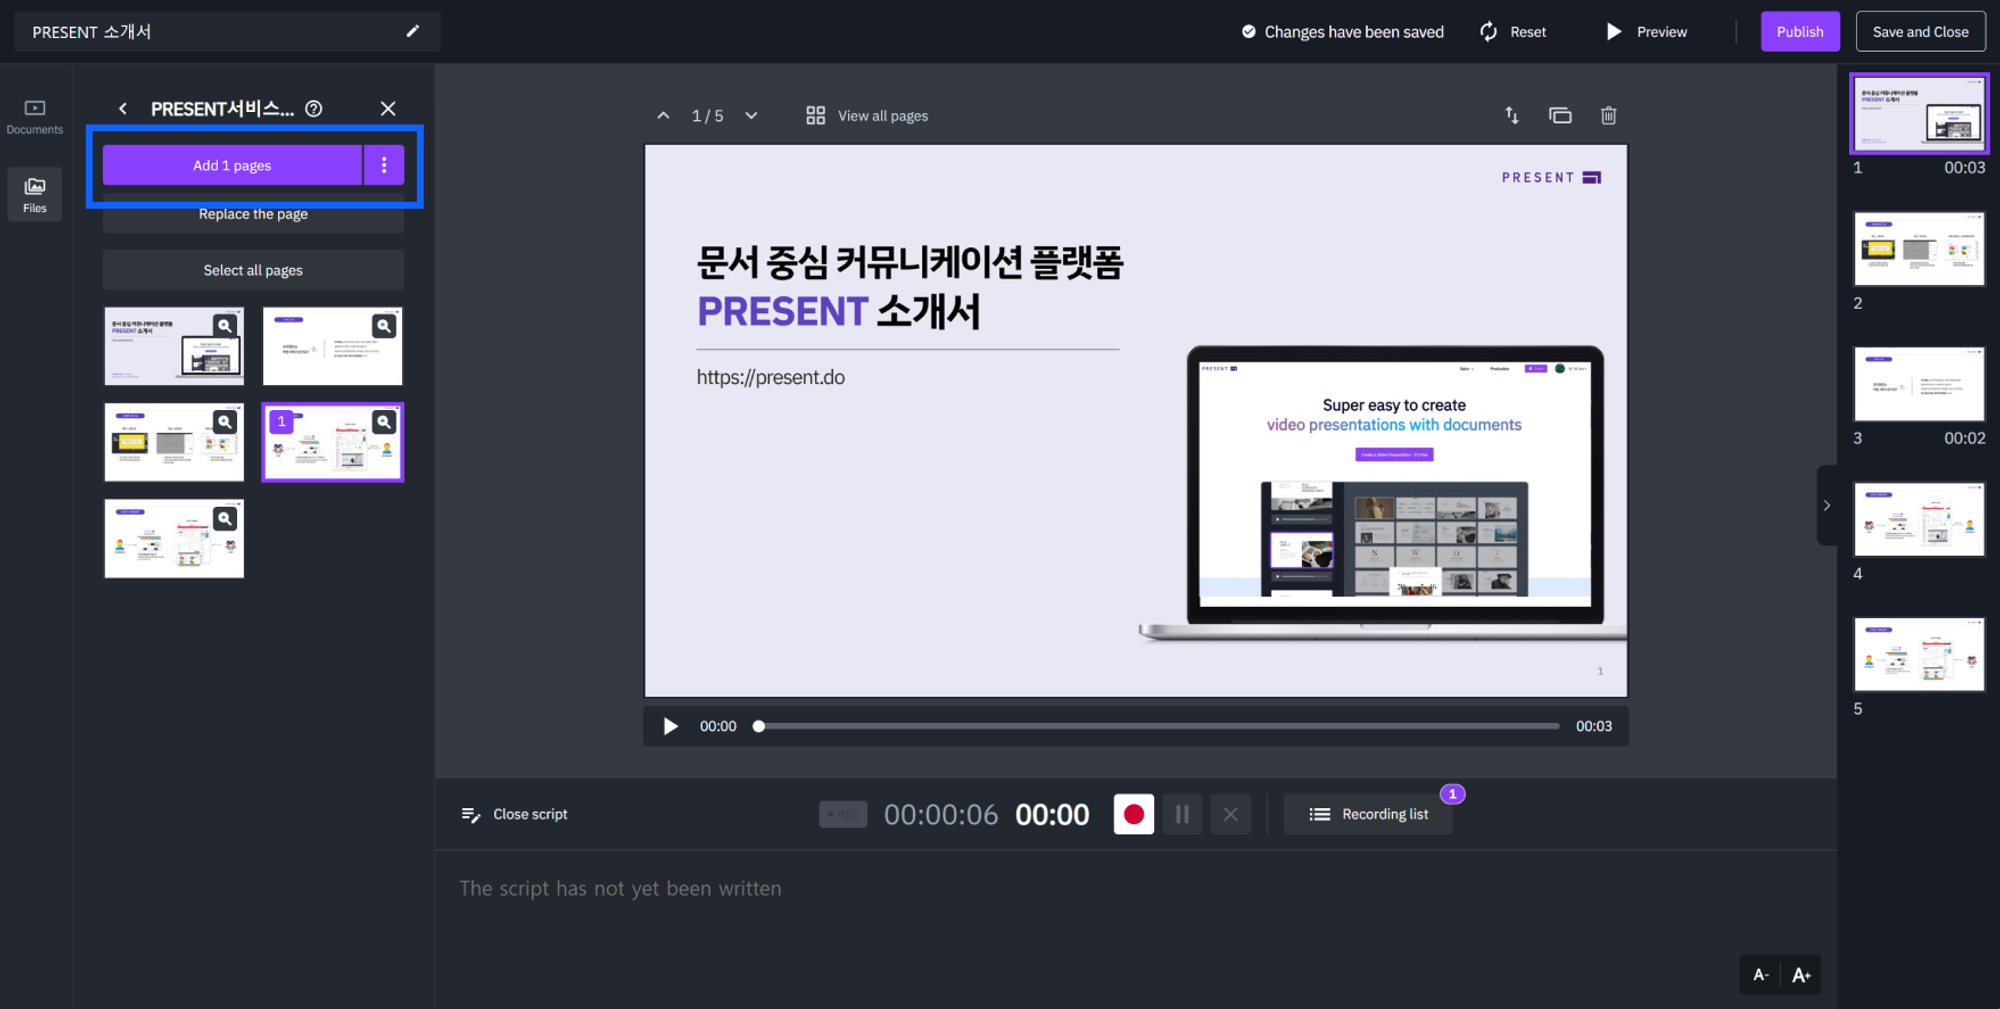
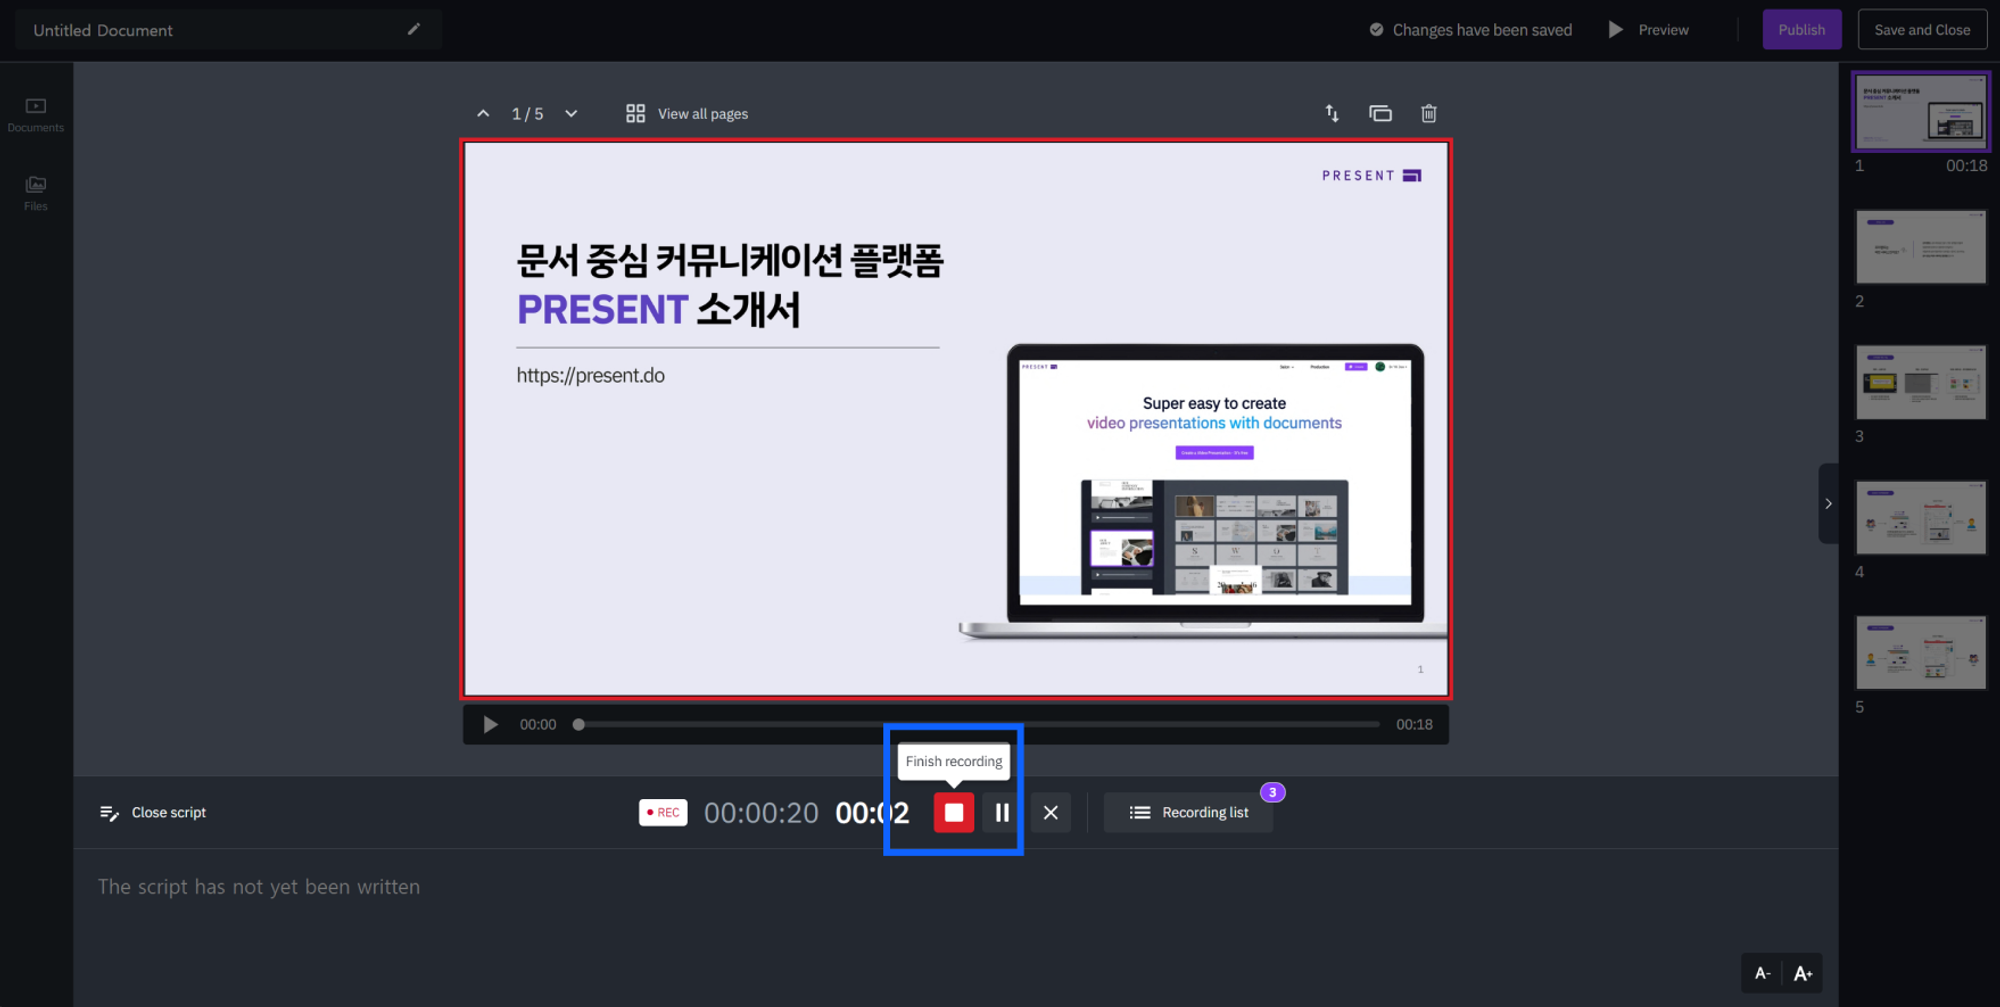
2. Click the Finish recording button
β’
After recording, click on
[Finish recording]
, the recording will be applied immediately and added to the
[Recording list]
.
Voice recording
Beginner
1. Add page
β’
Click
[Documents]
or
[Files]
on the left tab and select the desired document.
β’
Click the page you want to add and click [Add page] at the top left to add the page.
2. Replace page
Edit the page
Beginner
1. Click the publish button
β’
When you finish editing the document, click the
[Publish]
button at the top right of the screen to apply the document you are working on.
2. Enter document information
β’
Click the
edit icon
, enter the
title
and
description (optional)
of the document, select a
category
, and click the
[Save]
button.
Publish
Beginner
1. Click the Distribute this document button
β’
If you want to forward the published document to others, click the
[Distribute this document]
button.
2. Select distribution target
β’
Choose who to share the document to.
Distributing documents
Beginner
1. Click the references button
β’
Select the desired document from My Documents and click the
[References]
button on the right side of the screen.
2. Add video or file
β’
Depending on the type of file, click
[Add Video]
or
[Add a File]
to upload.
References
Beginner
1. Click the export button
β’
Select the desired document from My Documents and click the
[Export]
button on the right side of the screen.
2. Download in the format you want
β’
The export format supports I
mage (zip) / Document (pdf) / Video (mp4)
.
β’
Select the desired format and click the
[Download]
button.
Export
Beginner
Go to analysis
β’
You can view the analysis for
each target link
in the document.
β’
Go to the analysis by clicking the insight icon at the bottom right of the distributed document links.
Traffic
1.
Traffic Summary
- You can view summary information about today views and today unique audiences, total views, and total unique audiences.
2.
Views
- You can check the number of views and unique audiences by date.
Analyzing data
Beginner
Create a folder
1. Click the create a new folder button
β’
Create a new folder by clicking the
+ button
to the left of
Production > Documents > All
or the
folder icon
at the top right.
2. Enter folder information
β’
Enter the
title
of new folder, click the activated
[Create]
button to create a new folder.
Manage folders
Beginner
Move documents
1. Move location in same folder
β’
Drag and drop
the documents you want to reposition in
Production > Documents.
2. Move to another folder
β’
Click the
more button
at the top right of the document and select [Move].
If the Move button is not visible, create a new folder first. This button is only active when there are
two or more folders.
Manage documents
Beginner
Documents List
β’
You can see a list of the documents you have created in
Production > Documents.
Learn more about the document
1.
Viewer
- You can view the published document in the viewer.
2.
Versions
- You can see the version history that changes each time you publish a document.
3.
Export
- You can download a document as a file (image, document, video).
4.
References
- Add videos and files you want to reference.
5.
Viewer
- You can view the working document or the published finished document in the viewer before publishing.
Explore my documents
Beginner
Target setting
1.
Target name
- The name of the target
2.
Specify audience
- If you specify in advance the emails to which the link is allowed, access is allowed only for those emails.
3.
Request email
- Receive email input from your audience when you share a document. At this time, if you select Send document link by email, authentication for the email is added.
4.
Set password
- Set the password required to open the document.
5.
Expiration time
- You can set an expiration date for the link.
6.
Provide download
- You can format your documents for your audience to download.
Learn about targeting
Advanced
1. Click the distribute this document button
β’
Select the document you want to invite from
Production > Documents
and click the
[Distribute this document]
button.
2. Create a specified target link
β’
Click the
[Specified]
button to create a new target.
Invite the audience
Advanced
1. Click the distribute this document button
β’
Select the document you want to invite from
Production > Documents
and click the
[Distribute this document]
button.
2. Go to target settings after creating a link
β’
Create the desired
distribution target.
Collecting emails
Advanced
1. Click the distribute this document button
β’
Select the document you want to set the expiration date from
Production > Documents
and click the
[Distribute this document]
button.
2. Go to target settings after creating a link
β’
Create the desired
distribution target.
Expiration time
Advanced
1. Click the Export to YouTube button
β’
Click the
[Export to Youtube]
button in
Production > Documents
.
2. Grant Permissions
β’
Read the instructions for requesting permission to upload a video to YouTube and click the
[Confirm]
button.
Export to YouTube
Advanced